I started making this on Monday, now I have finally finished. It's a desktop calendar made using Time for Tea Designs Stamp sets.
January:
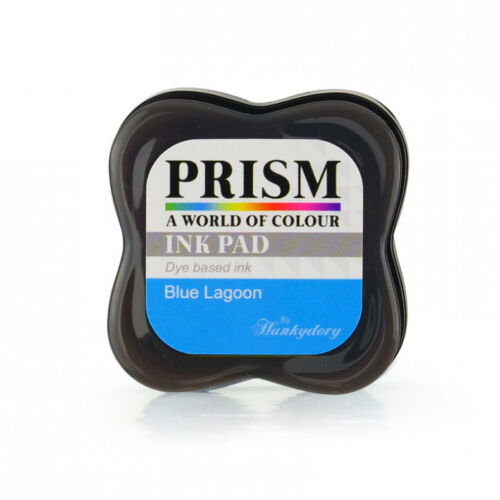
The troll is from T4TD's "Beauty Sleep" stamp set, Snowflakes are from "Christmas Deer", background is Hunkydory's prism "Blue Lagoon" ink pad, shading on the snow is Prism "Arctic Mist", the troll is coloured using Spectrum Noir Tri-Blends and Layers are done using "Hello Rectangle Stitched Nesting Dies", I used the 2nd (bigger card layer) and 3rd (smaller white layer) rectangles.
So I started by die-cutting a piece of smooth white card using the smaller of the two rectangles. I drew the hills and used "arctic mist" for shading. I then blended the sky using T4TD's beautiful blender brushes, then stamped the snowflakes using the same colour ink pad. I stamped the troll, coloured it in and fussy cut it out. I drew a little speech-bubble, wrote in it and cut it out. I layered it up using Hobbycraft's Bright shades card in blue cut to 6x6" and The craft place's origami super stack patterned papers. I cut the perforated edge of and added January from calendar tabs brought from The range.
February:
The heart and elephants are from T4TD's "Elephantastic" stamp set, same elephant but reversed stamped using Jennifer McGuire Ink's method (
Here). The background is Hunkydory's Prism "Pink Jellybean", "Camellia Pink" and Hobbycraft's ink pad in "Fuchsia". Layer dies are the same as January. Elephants are colouring done with Spectrum Noir Tri-Blends.
I started by die-cutting the smallest rectangle in smooth white card and blending the background using "Pink Jellybean". I then used T4TD's "Wonderful Waves" stencil and "Camellia Pink" to make the cloud look. For the heart background, I used printable heaven's heart stencil and the "Fuchsia" ink pad. I stamped and reverse stamped the elephant with the heart, coloured them in and fussy cut them out. I layered it up using Hobbycraft's Brights card in Pink cut to 6x6" and The origami super stack paper pad. I cut down and stuck on the February sheet.
March:
Bee, hive, tree branch are from the "Bee Happy" stamp set, The big flower is from the "butterflies" stamp set and the little flower is from the "Moovellous" stamp set. The background is Prism "Blue Lagoon" and "Rainforest Green". The same layering dies as before and colouring is done with Spectrum Noir Tri-Blends.
As before I cut the smallest rectangle in smooth white card, this time I stamped the tree branch, hive, big flower, little flowers and drew the grass line straight onto the background. I masked off the tree, hive, big flower and grass then blended sky using "Blue Lagoon". Then I masked off the big flower, little flowers and blended the grass using "Rainforest Green". I stamped, coloured and fussy cut the bee. Then coloured in the tree, hive, big flower and little flowers. I layered it up using Hobbycraft's Primary card in Yellow and paper from the origami paper stack. I cut down and stuck on the March tab.
April:
Troll is from "Beauty Sleep" stamp set, Umbrella, clouds, raindrops and puddles are from Hunkydory's Love of stamps "Brighten your day" stamp set, the sky is prism "Blue Lagoon" ink pad, the same rectangle dies as before and colouring is done with Tri-Blends.
I started with the small stitched rectangle of smooth white card. I stamped the clouds, raindrops and puddles straight onto the background, I didn't mask off the clouds I just blended the sky using "Blue Lagoon" going over the clouds so the blue will show through once the clouds are coloured. The ground and clouds are coloured using Tri-Blend "Vintage blue blend". I drew a speech bubble and wrote "It's too wet" in it then I stamped the troll and umbrella, coloured them in, fussy cut them all out and put the umbrella in the troll's hand. I then layered it up using Hobbycraft's Primary card in blue and paper from the origami paper stack. Then I cut the April tab down and added it to finish.
May:
Cow, bird and flower are from the "Moovellous" stamp set, Butterfly is from "Butterflies" stamp set and Branch is from "Bee Happy", the background is prism "Blue Lagoon" and "Rainforest Green" ink pads, dies are same as before and colouring is done with Tri-Blends.
I started with the small stitched rectangle of smooth white card. Made a mask for the grass by cutting out a wave-shaped piece of scrap card. Blended the sky using "Blue Lagoon" and the mask to make the shape for the grass, then I blended the grass using "Rainforest Green" and masking off the sky. I then stamped the cow, flower, branch and butterfly, coloured them in and fussy cut them out. I then layered it up using Hobbycraft's Brights card in green and paper from the origami stack. Then cut down and added the May tab to finish.
June:
Bonnie (girl), sentiment and sandcastle all from "Life's a Beach" stamp set, the sky is prism "Blue Lagoon" ink pad, Sand is coloured in using Tri-Blend "Gold brown blend" and the rest is coloured using Tri-blends.
I started with the small stitched rectangle of smooth white card. This time I stamped straight onto the background. I stamped Bonnie, the sandcastle, the sentiment and drew some sand dunes. I blended the sky using "Blue Lagoon" making sure to mask off the top part of Bonnie. I coloured in Bonnie, the sand and sandcastle using Tri-Blends. I layered it up using Hobbycraft's Brights card in orange and paper from the origami stack. Cut down and added June to finish.
July:
Troll is from "Beauty Sleep" stamp set, Sun is from Time for Tea's "box clever" die set, the background is prism "Blue Lagoon" and "Jersey Cream" ink pad, the same layering dies as before and colouring is done with Tri-Blends.
I started with the small stitched rectangle in smooth white card, drew a slightly wobbly line for the ground. I Blended the sky using "Blue Lagoon" using a piece of scrap card as a mask for the ground and blended the ground with "Jersey Cream" using the scrap card to mask the sky, I added a few cracks to the ground using a similar coloured Tri-blend marker. I stamped the troll, bottom tip of the ice cream cone from "life's a beach" stamp set, drew a speech bubble with "it's too hot" in it, drew a blob of ice melting ice cream and die-cut the sun, coloured them in and fussy cut the stamps and drawings out. I then layered it all up using Hobbycraft's Primary card in red and paper from the origami pad. Then to finish I cut down and added the July tab.
August:
Dogs are from the "Pawsome Christmas" stamp set, tree and fence are from the "Moovellous" stamp set, bushes are from the "Box Clever" die set, clouds are drawn using the "Wonderful Waves" stencil, background is Prism "Blue Lagoon" and "Rainforest Green" ink pads, same layering dies as before and colouring is done using Tri-Blend markers.
I started with the small stitched rectangle in smooth white, drew a line to divide the grass and sky. Blended the sky using "Blue Lagoon" and using a scrap piece of card to mask off the grass, then I blended the grass using "Rainforest Green" and masking off the sky. I stamped the dogs, fence and tree, drew the clouds using the stencil (shading with "Arctic Mist" Prism ink pad) and die cut the bushes. I coloured them all in with Tri-Blend markers and fussy cut out the stamps and drawings, I tried some swirly kind of thing on the bushes and tree to make them look bushy, not sure if it worked. I layered it all up using Hobbycraft's Primary card in green and paper from the origami paper stack and to finish added the August calendar tab.
September:
Squirrel, Fox, leaves, mushroom and acorn are all from "Woodland Critters" stamp set, the branch is from the "Bee Happy" stamp set, Background in Prism "Orange Zest", "Canary Yellow", "Jersey Cream" and "Rainforest green", layering dies are same as before and colouring is done with Tri-Blends.
Starting with the smaller rectangle of smooth white card, I blended the sky using "Orange Zest" and "Canary Yellow" using a circle of scrap card to mask off the sun and scrap card to mask the grass, I blended in the sun using "Jersey Cream" and then blended the grass using " Rainforest Green" using scrap card to mask off the sky. I stamped the fox, squirrel, acorns, heaped leaves (several times as the falling leaves are cut out from the piled leaves as the were shaped better), mushrooms and branches ( I made the bigger branch by stamping the branch at different angles), then I coloured them in and fussy cut them out. I layered it all up using Hobbycraft's Primary card in yellow and paper from the origami paper stack. I finished it with the September calendar tab.
October:
Troll is from "Beauty Sleep" stamp set, doggy and kitty ghosts, witch hat and treat bag are all T4TD's "Yappy Halloween" digital stamps, branch is from "Bee Happy" stamp set, background is Prism "Nautical Blue", "French Navy" and "Evergreen" ink pads, layering dies same as before and as always colouring is done using Tri-Blends.
Starting with the smaller stitched rectangle I blended the sky using "French Navy" and "Nautical Blue", masking off the moon with just a circle of scrap card and for the stars I used a white gel pen. For the grass I used "Evergreen", masking off the sky using scrap card. I stamped the troll and branch, drew a speech bubble with "It's too dark" written in it, printed off the digital stamps (after I resized them to fit with the troll), coloured them in and fussy cut them out. I stuck the hat on the troll, cut away any excess hair that stuck out and I drew in the handle of the treat bag after they were stuck down. I then layered it all up using Hobbycraft's Primary card in blue and paper from the origami paper stack. I finished it with the October calendar tab.
November:
Hedgehog is from "Woodland Critters" stamp set, Kitty is from "Pawsome Christmas" stamp set, marshmallows and bonfire are just hand drawn, background is Prism "French Navy", "Nautical Blue" and "Evergreen" ink pads, Layering dies are same as before and colouring is done using Tri-Blend markers.
Starting with the smaller stitched rectangle, I blended the sky using "French Navy" and "Nautical Blue", masking off the grass and adding stars using a white gel pen (the shooting stars are just blobs of white and then flick the pen for a tail). I then blended the grass using "Evergreen" and masking off the sky. I stamped the hedgehog and kitty, drew the bonfire and marshmallows, coloured them in, fussy cut them out and I drew in the skewers once they were stuck down. I layered it all up using Hobbycraft's Primary card in blue and paper from the origami paper stack. I finished it with the November calendar tab.
December:
Penguins are from "Warm Winter Wishes" stamp set (same penguin but reversed stamped), trees and hills are from the "Christmas Deer" stamp set, background is Prism "Blue Lagoon" and "Arctic Mist" ink pads, layering dies are the same as before and colouring is done using Tri-Blend markers.
Starting as always with the smaller stitched rectangle, I stamped the hills using the same stamp but just stamping it at different angles to finish the hills, then just inking and stamping the trees on the other side. I then masked off the hills and trees and blended the sky using "Blue Lagoon" and stamping the sparkle/snowflake stamp from "Christmas Deer" in the same colour just to add a bit of texture to the sky. I shaded the hills using "Arctic Mist", then I drew in the ice and blended it with "Blue Lagoon" and "Arctic Mist" to get the ice look. I stamped and reverse stamped the penguins, I drew the feet instead of the stamping them to get rid of the slippers, I drew the leg on the boy penguin so it looked like he was standing and changed the eyes on the girl penguin so she didn't look like the same one. I then coloured them in and fussy cut them out. I then layered them all up using Hobbycraft's Brights card in blue and paper from the origami paper stack. I finished it with the December calendar tab.

I hope you like this project. Thank you for popping by :)
All these amazing stamp sets, digital stamps and blending brushes can be brought
Here